A guide for beginners to Vermintide. Inform newcomers about certain things in the game. This guide will not talk about in game controls as that is covered in the Game Tutorial or Help tooltips.
Guide to surviving the Vermintide: Beginner's Edition[ | ]
So, you wanna slay rats? You started at the right place. This is a guide to all things Vermintide, and we'll start right at the beginning.
Skaven[ | ]
"Surface Dweller!" -Some rat I killed
According to the all majestic Wikipedia, the Skaven are a race of anthropomorphic rat men. They are basically giant rats that stand upright, talk and are smart compared to regular rats. These are the guys you'll be killing a lot of. Get used to their ugly mugs, 'cause a lot of them are going to lay bloodied and distorted at your feet. They are the main enemy of Vermintide and come in a few shapes and sizes. (Note: You can mark special enemies, highlighting them in a blue outline. Default button is R1 on Ps4 and T on PC.)
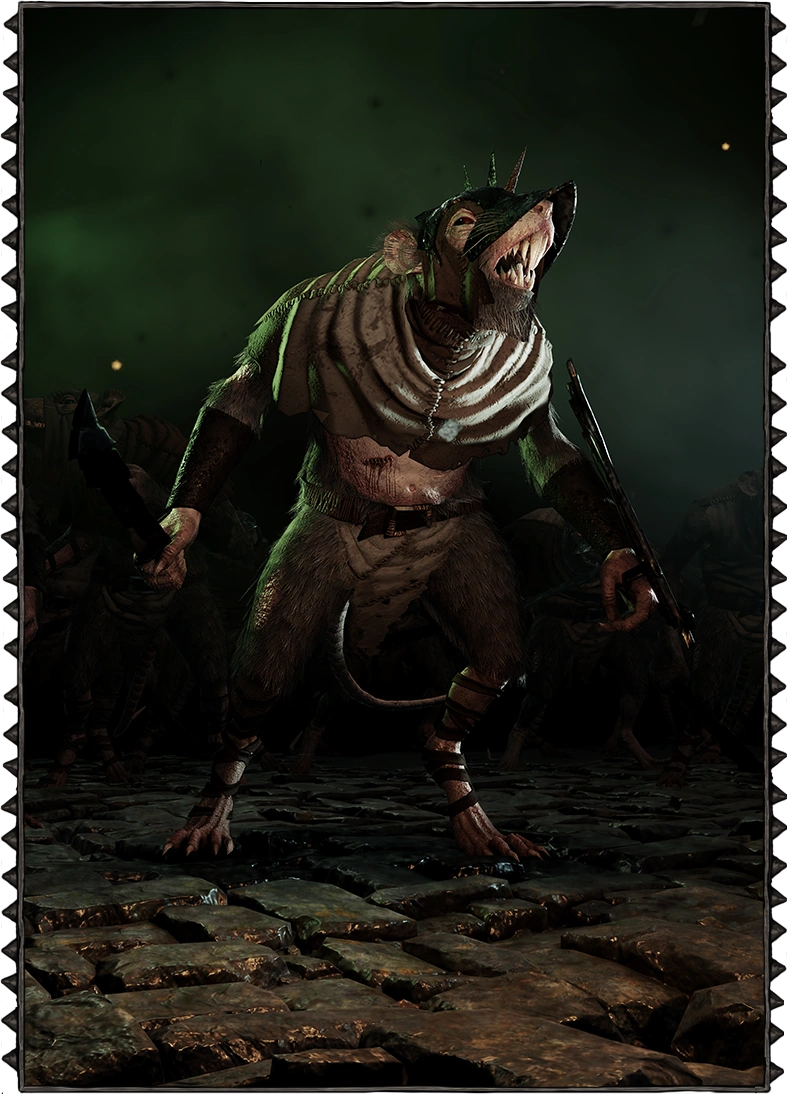
Clanrat[ | ]
"I burn, then eat-eat you!" -Another rat I killed #Find Out More [[1]]
Most of the metal fodder you'll be facing are Clanrats. You'll kill a lot of them, but you'll definitely get stabbed by some of them. They are littered around the map as you try to reach your objectives and make up some of the hordes that come. They come with a variety of weapons with slightly different attack reaches and speeds, but generally they try to swarm you all at once and get a stab in. Some even spawn with fire weapons which make them so much easier to see in the dark. We'll talk more about hordes later, for now just concentrate on how best to cut this guy up. Go on, imagine it. Good. On to the next guy.
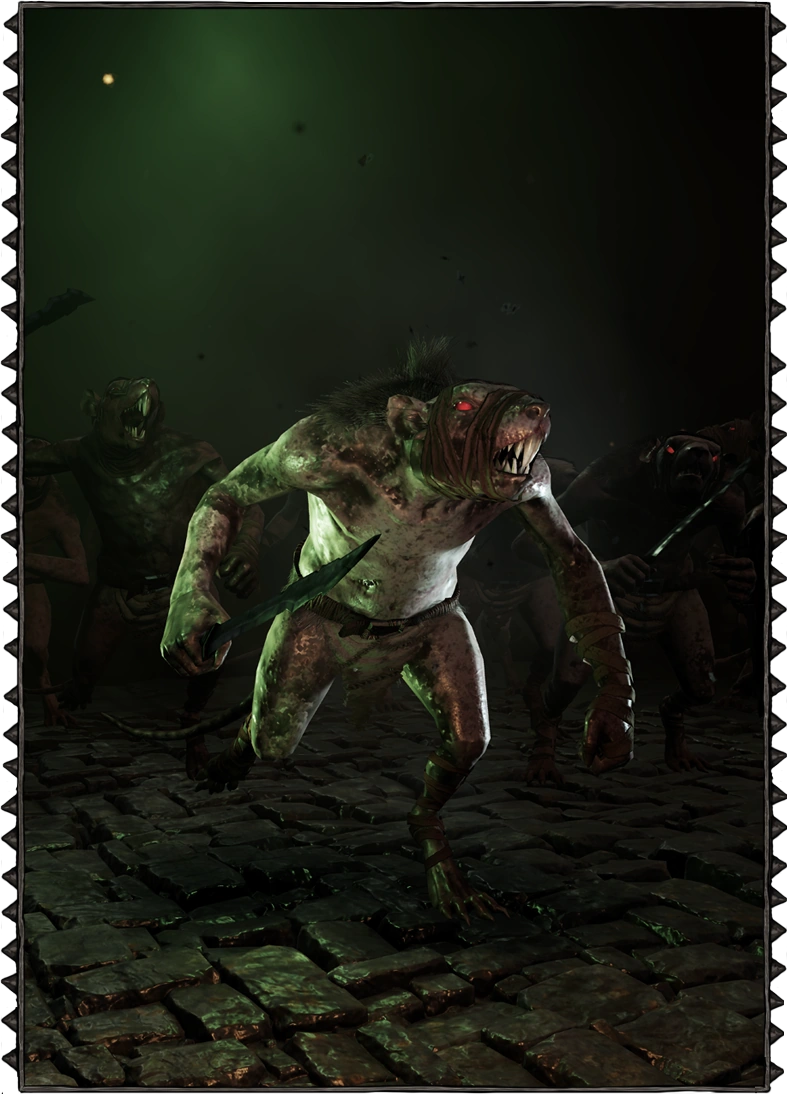
Skavenslaves[ | ]
R.I.P. Johnny Ratman. Good father, better slave. #Find Out More [[2]]
If you've ever heard of the phrase "Quantity over Quality," that's the Skavenslaves in a nutshell. You'll just be strolling along the street killing rats when you'll hear a loud horn or an ambush. That's when a large number of these guys will pop out and try to get a stab in. They are slightly smaller than the Clanrat which also means you'll miss your swing once in awhile. These guys are slippery little devils. They come with a variety of weapons but do a little less damage than the Clanrats, as well as being generally a little weaker individually. But that's not the point is it? Cause they DON'T come individually. They come in freaking huge numbers, swarming you and poking you every time they get a chance.
Packmaster[ | ]
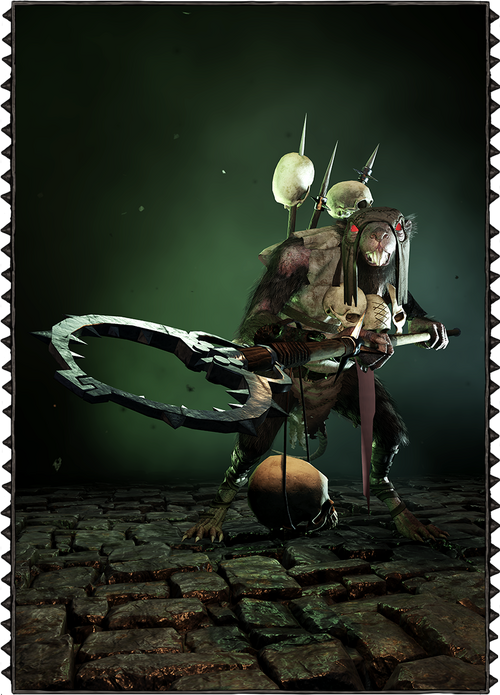
"Slave thing! Catch, catch, catch, catch, catch, catch, catch, catch!" -Currently dead Packmaster #Find Out More [[3]]
Packmasters are really, really weak. They can also be a huge pain in the buttocks. They sneak around and wait for a moment of weakness. Then they grab you, or one of your mates and drags them along, rendering them helpless and slowly dying, oh and also further and further away from the rest of your lot. It doesn't care that you're currently fighting a swarm. Doesn't care if you're currently fighting an Ogre. Not even if you're AFK. This punk does not have the slightest bit of decency so I suggest you pull out your crossbow and nick it in the johns the moment you see it.
Stormvermin and Patrols[ | ]
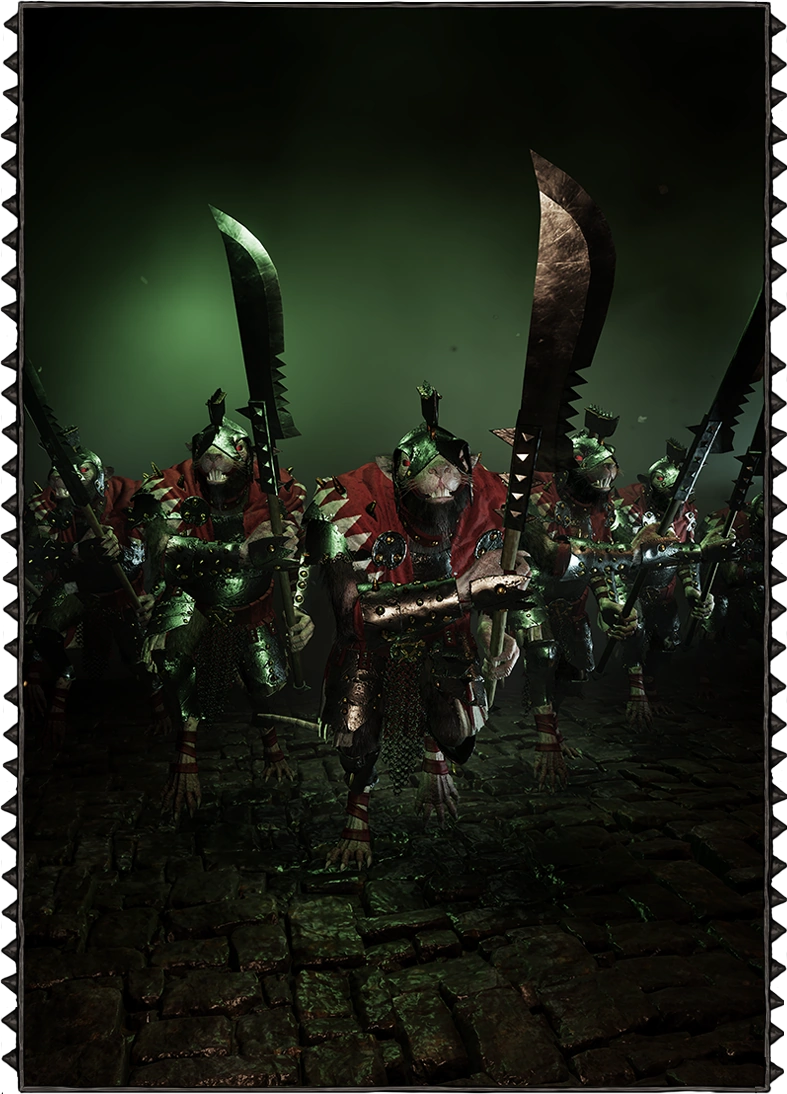
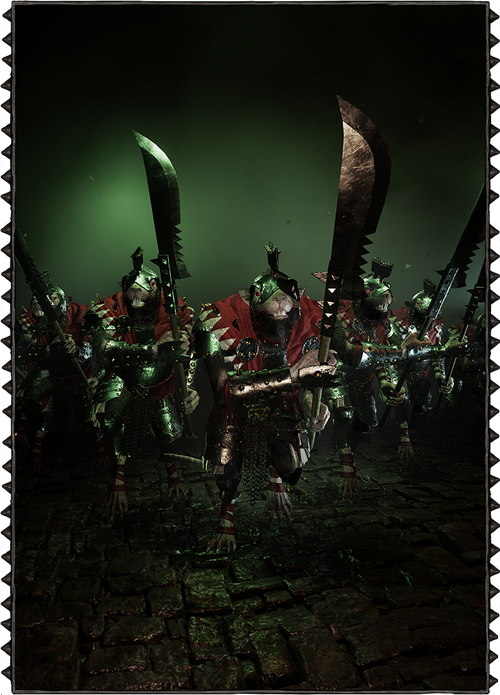
Left, right, left, right, squeaking till the mornin' light. #Find Out More [[4]][[5]]
Armour can be a real downer sometimes. The Stormvermin are the slightly larger, more combat efficient versions of the generic Clanrat. Carrying polearms and fully clad in armor, these guys pack a wallop and most of your attacks don't even seem to get through. Only attacks with Armor Penetration will manage to make a difference. We'll talk more about that in a while too. They are far less numerous on the map, thank the Emperor, but are each quite dangerous, not to mention a whole patrol of them. The most common beginner mistake is getting the attention of a wandering Stormvermin Patrol, so if you hear something resembling marching sounds and the militaristic squeaks of these buggers, get onto your chat log and warn your friends to hide. Patrols will walk around the map and can be avoided. The individual ones you gotta kill though. (Fun Fact: On Cataclysm, Stormvermin can instakill you with their downwards swing.)
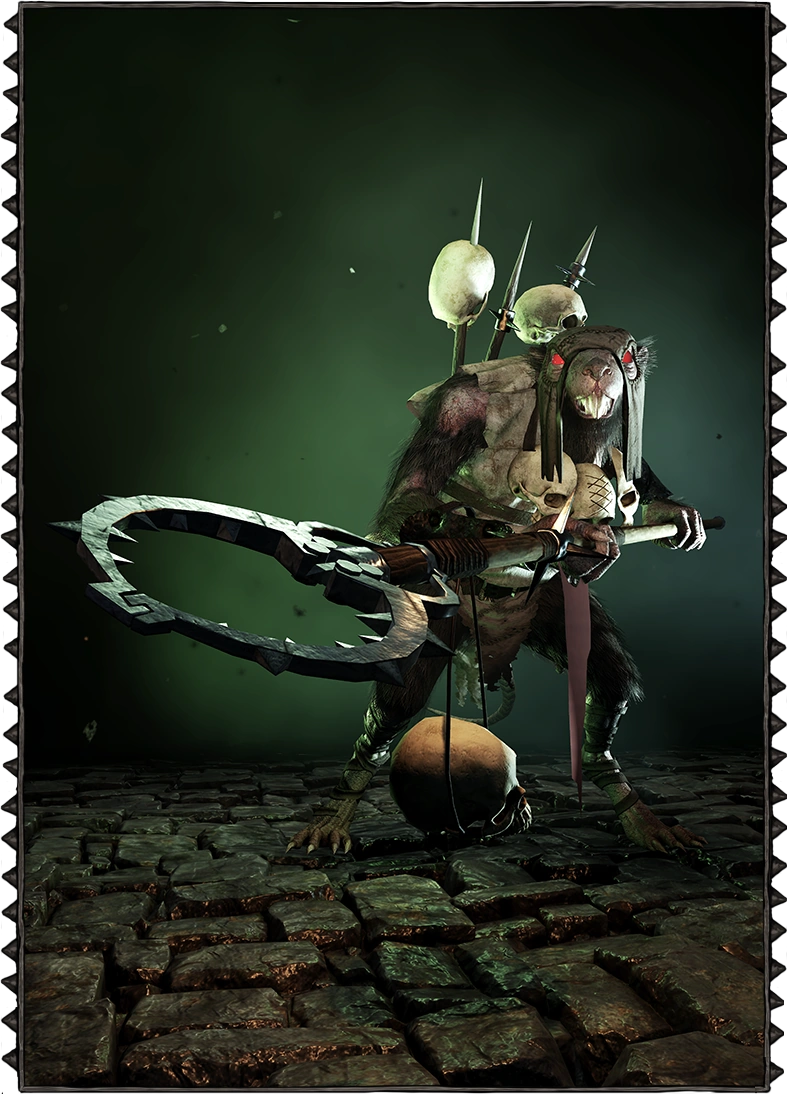
Poison Wind Globadier[ | ]
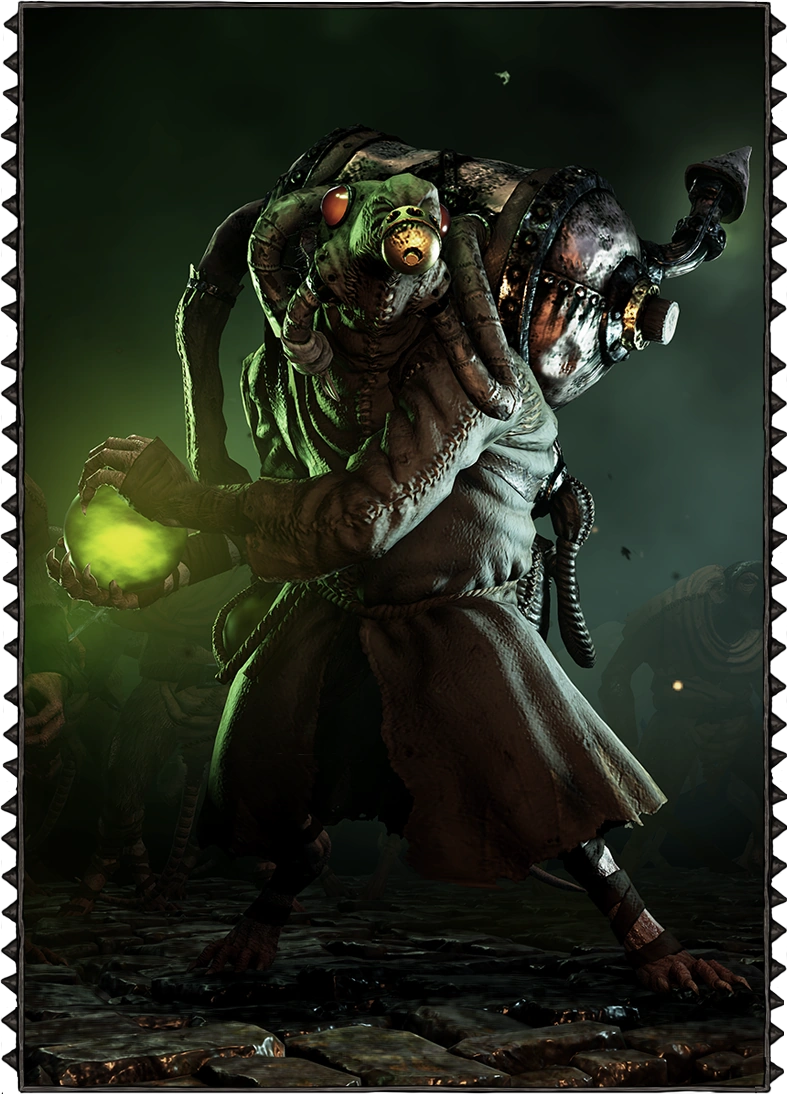
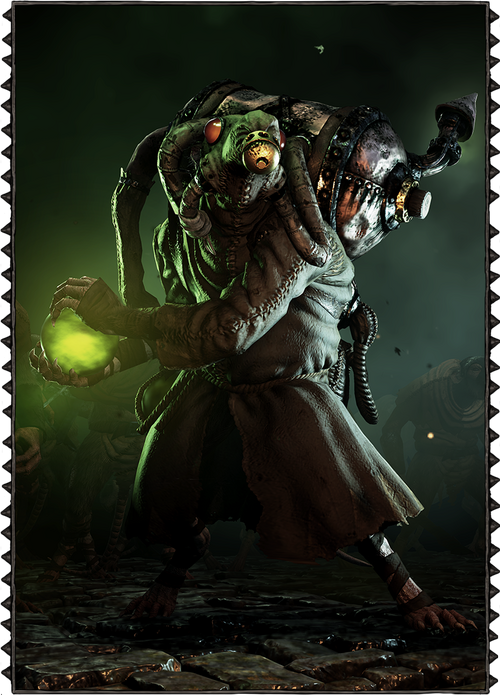
Humans appear.*Breathing Intensifies* #Find Out More [[6]]
Know how there's always one weird kid in the block that ruins the party? This is the rat version. It lobs balls of poison once in a while to your lot which makes a poison cloud. The cloud makes it hard to see and does damage to everything in it. Yep, even its fellow rat people. Honestly, I don't see much of a use for the guy. Bet it was some rat who was bullied in high school and just needs love and attention. Bullets and arrows will most likely bounce off it's metal gear so give it a kiss with your hammer and move on.
Ratling Gunner[ | ]
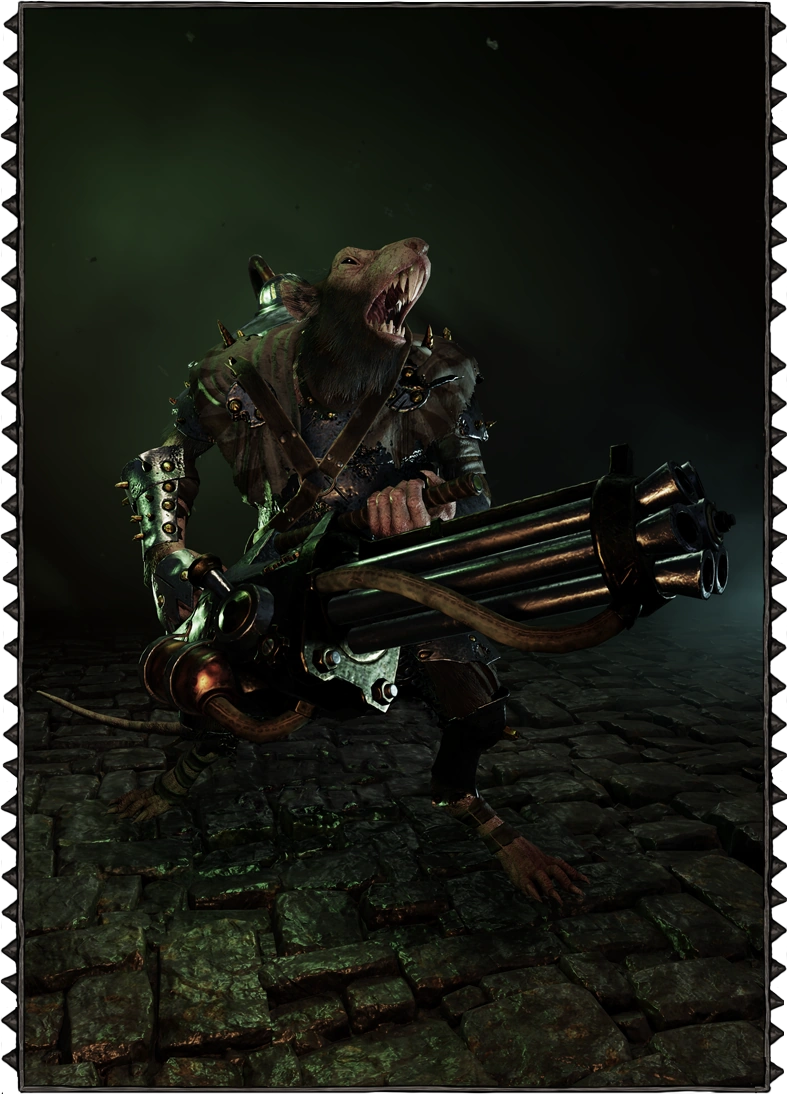
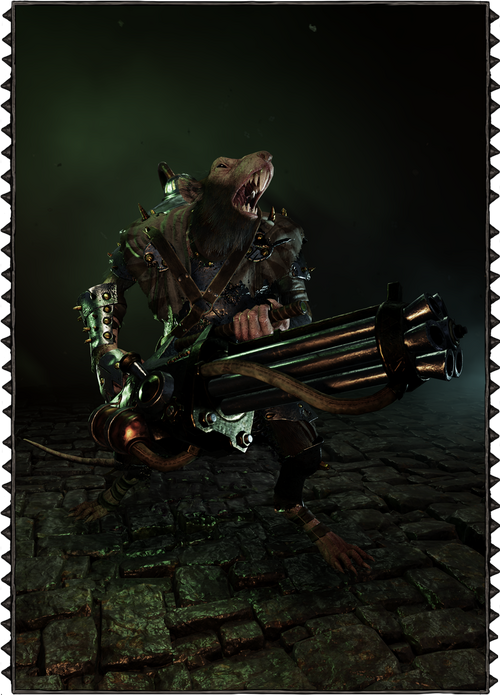
Rat-tat-tat-tat-tat-tat-tat #Find Out More [[7]]
As dangerous as they are a cheesy pun, the Ratling Gunner would be devastating were it not for its really tiny brain. When it appears, it chooses a target out of the lot of you and simply fires away. Only at the target. Opening itself to one o' you simply strolling down to it and smacking it right in the head. Its range is pretty far and shoots a ton of bullets at its target, so if that's you, just make sure to have cover between you and it and your friends should clean it up soon.
Gutter Runner[ | ]
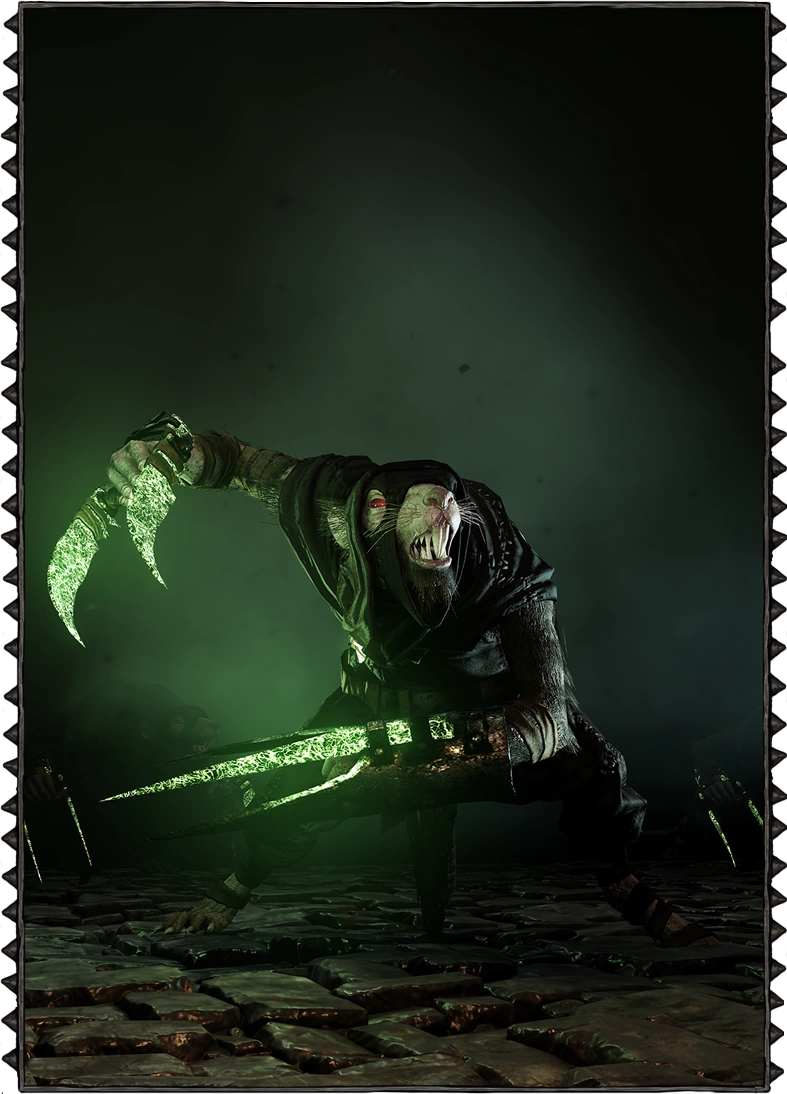

Sneaky, stabby, stabby, sneaky! -Gutter Runner that doesn't run in gutters anymore #Find Out More [[8]]
Being an actually really witty pun, these guys are much more dangerous than the Ratling Gunner. The Gutter Runner is a sneaky little bugger who, much like the Packmaster, doesn't give a damn about your priorities. It finds a member of your team, usually the one who's alone, and pounces on them, leaving them defenseless as they stab and stab and stab away. Unlike the Packmaster, you'll remain at the position of where you are helplessly being gored out, but take a lot more damage than the Packmaster would deal. Its pounces are also pretty long ranged, so watch out for it. Another thing, if it is hit while stabbing someone to death, it gets thrown off and will attempt to disappear again. It does so in a puff of smoke. Try killing it before it does that, or someone is probably gonna get an early, gory colonoscopy again pretty soon.
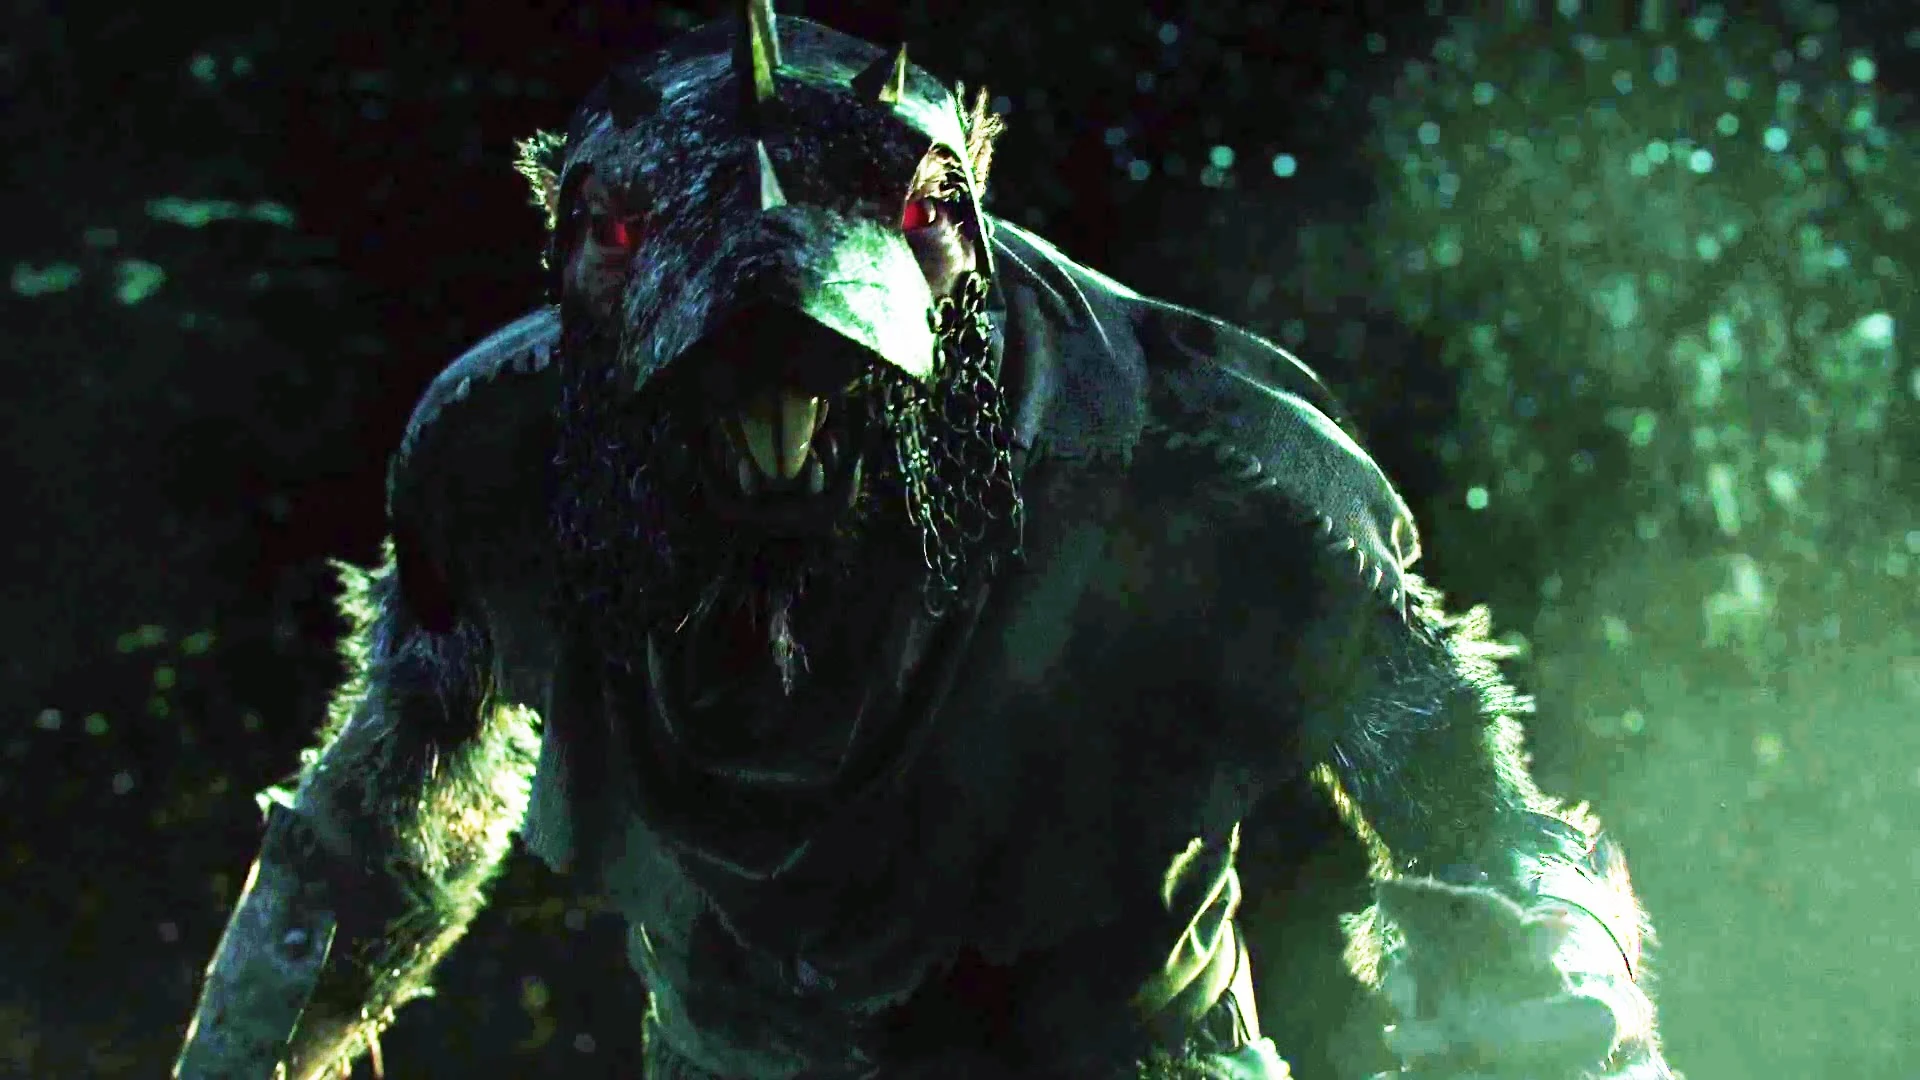
Rat Ogre[ | ]
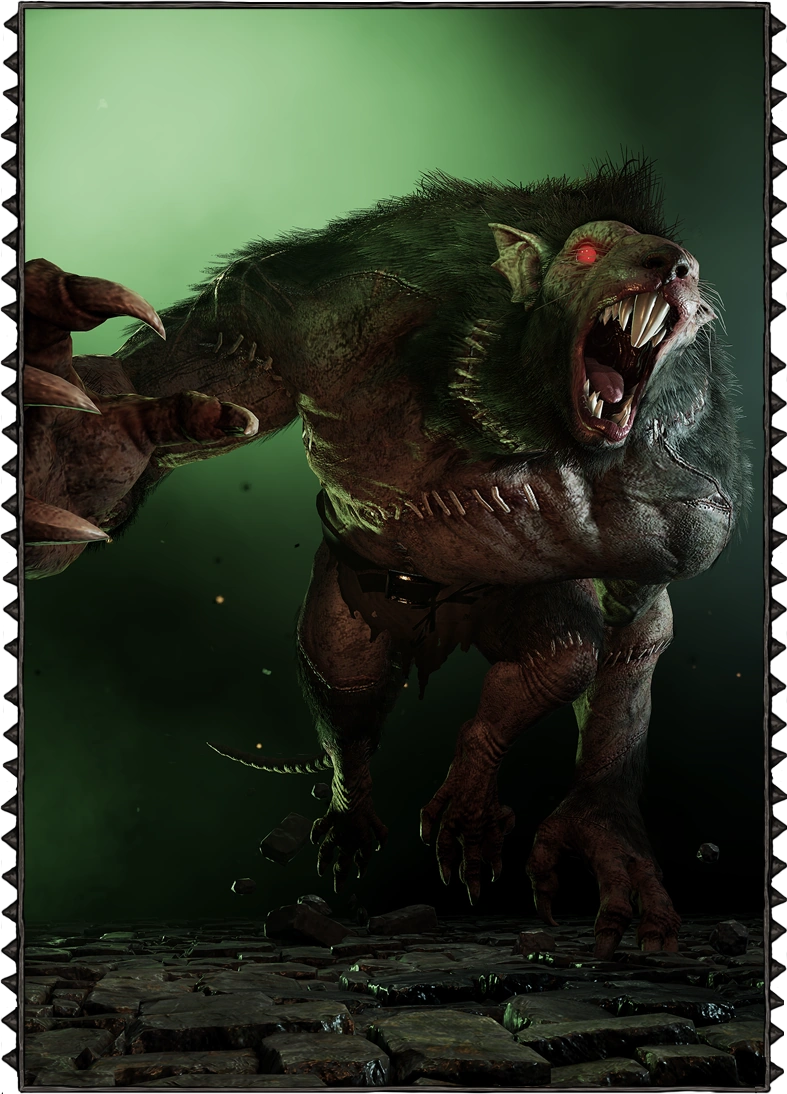
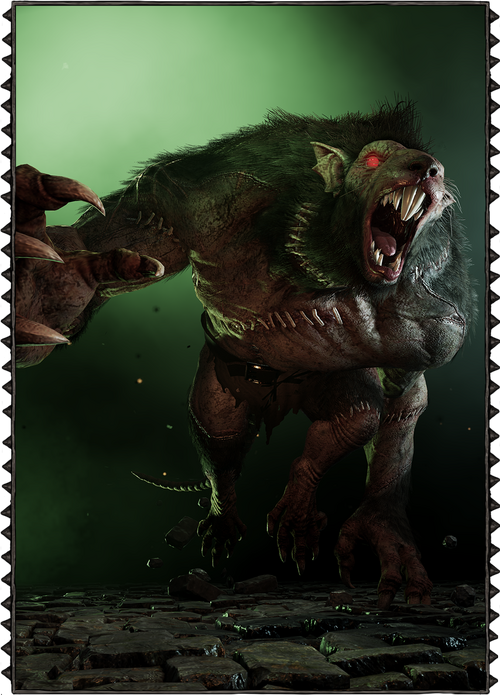
ROAR. #Find Out More [[9]]
Don't say I didn't save the best for last! The rat ogre. Man. This guy's just a brute. It's crazy and immensely, TERRIFYINGLY strong. I mean, it can really take a beating and dish it right back out. It'll take a lot to kill this guy so you'll need your whole team on it. If, and when it appears, try to make priorities on what you need to do, cause chances are if you're as unlucky as I am, it'll come with hordes or packmasters and the like. It has 3 moves, mainly. A big jump, when it jumps to where you are and smashes, sort of, dealing no damage but a large knockback. A ground smash, which you can dodge by dodging backwards, and an arm swipe which hurts quite a bit and is difficult to dodge. Also knocks you back quite a bit, but if you're anything like me, you'll be glad to get some distance from this thing. Managing the aggro of the Rat Ogre is important if you want to minimize the damage taken from it. When its attention is on you, you should prioritize running and dodging while the others should put it full of holes. When its close to hitting you, one of the others should do a block bash to get its attention on them. Then rinse and repeat and it'll be dead soon enough. Using a bomb on this guy is also not a waste, pretty much helps to shorten the time it will be on the map, meaning lengthening the time you'll be on it.
Those are all the Skaven types you'll encounter. Let's move on to...
Weapons and Damage Types[ | ]
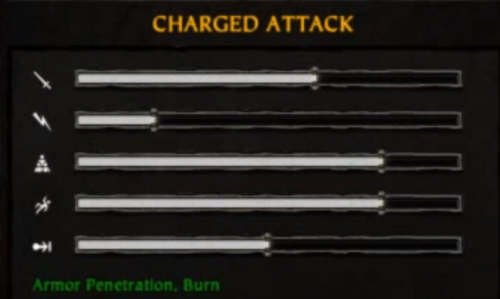
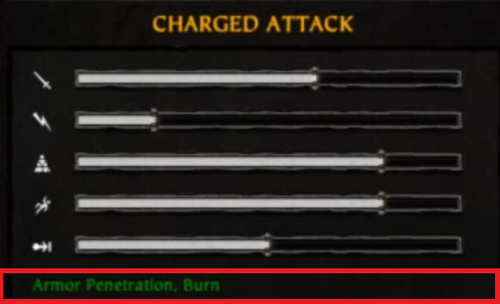
There are a lot of weapons in Vermintide, and they each have their own Attack stats, and Charged Attack stats.

Must shoot for shiny lewt.
The various stats available are:
- Damage
- Speed
- Targets
- Knockback
- Range
Just for the sake of them peeps who haven't ever played a game before, I'm going to break these down a little more.

Damage refers to the amount of pain inflicted onto our rat buddies when your hammer hits them. More this is, fewer hits it'll take for Johnny Ratman to be laying lifeless on the floor. You can increase your damage temporarily by drinking a potion of strength.

Speed refers to how fast your hammer will swing. Higher this is, the more swings per minute, and no, biceps day at the gym won't help. You can temporarily increase your swing speed as well as your movement speed by drinking a potion of speed.

Targets refers to how many rats you can bash in with one swing. The higher this is, the more rats will take damage. Although, damage seems to be lower the more targets it has already hit. This will require confirmation. Special enemies like the Stormvermin who are bulky or have armor will stop your swing when you hit them though, so you may not hit as many as you'd think.

Knockback refers to how far the rats will be pushed away when they get hit by your swing. From simply staggering a little to full on flying, this stat determines how much of a reaction you'll be getting out of the rat(s) you hit, which leads to a longer downtime for the rat.

Range, for range weapons, simply determine how far your bullet or arrow will go. If what you're aiming for is further than what your range allows, chances are you won't hit it. Confirmation is required to see if it's still possible to hit and if the Range stat simply determines how well your projectile does against gravity.
Those are all the stats there are. Now on to damage types.

Damage types are stuff you see on your weapon, like Armor Penetration, Headshot, etc. There's an etc there 'cause there's a whole lot of 'em. For a BEGINNER'S GUIDE, we'll only be talking about these two:
- Armor Penetration
- Headshot
See, some enemies like the Stormvermin have armour on. This means your sword will just make sparks instead of blood when you swing it at 'em. Most weapons do have either the normal attack or the charged attack with Armor Penetration, so you have to use those to get through to them. Exactly like what it means, the Armor Penetration Damage type allows you to damage enemies even if you hit them where they have armor on with that attack. But remember, if your sword's normal attack doesn't have Armor Penetration but its charged attack does, only the charged attack will have that effect. Don't go swinging your sword normally at armor folk thinking otherwise.
Headshots are different. Attacks with the Headshot Damage type allows you to deal a lot of extra damage when you hit rats in the head, most usually resulting in an instant kill for most of them except the sturdy ones. Weapons like the rapier on the Witch Hunter are balanced to work best in utilizing headshots, so make sure to do that or you'll find yourself working at half capacity.
Crafting[ | ]
Here, I'll explain a little on crafting and what you need to know. Crafting is broken down into 6 components:
- Fuse
- Upgrade
- Salvage
- Invocate
- Offer
- Pray
FUSE refers to melting 5 items of the same rarity to form another item of the next upgraded rarity. Straightforward right? Put 5 whites (common) in, get 1 green (uncommon).
What a bunch of people don't know is that you can add control over the resulting item by choosing which items to put in. If you put in 5 white one handed swords, you'll get a green one handed sword. If you put in 5 green sword and shields, you'll get a blue (rare) sword and shield. That's basically it for forging.
The UPGRADE process is peculiar. Remember how we talked about greens and blues? Well, greens and above come with special traits that are locked by default. You need to use special rocks to unlock these traits and they will work passively from then on out. It takes rocks one rarity-tier lower than your weapon to upgrade (white for green, green for blue, etc.).
There are 4 types of special rocks: white, green blue, and orange.
"Hold up, aren't those the same colors as my weapons?"
- You
Ah, you saw that, didn't you? Yep, that brings us to salvaging. By putting an item in SALVAGE, you get its corresponding color of rock back. It appears that the number of rocks you get back per item is randomized. I've gotten only 1 for some but up to 4 for others. Huh. No idea why... [Note: a recent update greatly increased the number of rocks you get from salvaging. It seems that the maximum rocks received now is 25]. Anyways, the rarity of the item doesn't seem to influence this "trade-off" of items for rocks. So happy salvaging!
On weapons with multiple traits, unlocking a trait will double the price of unlocking the next one. So you might want to pick the first trait wisely if you're short on rocks.
The last note I'll leave you with for upgrading is about the traits. Some traits come with a range of percentages to activate. For example, 2% - 10% chance on a kill to recover 10% Health. When a range like that shows up, it means that the moment you unlock that trait, you'll get a fixed randomized percentage chance between the range. The unlocked percentage is already determined when the weapon is obtained(just not unlocked yet) so save your time restarting the game, will ya?. To sum up, lest you misunderstand, the final resulting unlocked trait will not be a 2% - 10% chance. It may be a 8%, maybe even a 2.5%, but it won't be a 2% - 10% chance. It doesn't differ between each instance of activation of the trait, on a kill in this example. After unlocking it's a *FIXED* percentage. Clear enough? Did I stutter? No? Let's move on.
*However, once you unlock the Shrine of Solace, you can choose to re-roll a trait's percentage by going to the INVOCATE tab and using materials respective to the rarity of your weapon (green for green, blue for blue, etc.). You can re-roll the entire trait for a completely different trait by going to the OFFER tab and using stones of the same color as your weapon.
The Shrine of Solace can also be used to get new loot completely out of thin air by going to the PRAY tab. You select a trinket to pray on and then can set what loot you want (Melee, Ranged, or Random) and what rarity you want it to be. The rarity you select is the color of stones that the shrine uses. If you choose Random instead of Melee or Ranged, praying uses less stones. So save up them stones and get praying to the RNGeezus!
Gameplay and Encounters[ | ]
A typical game of Vermintide will last about 15 minutes, give or take, depending on difficulty. Throughout these 15 minutes, you'll do a bunch of stuff, mostly killing rats.
The main objective is always to get from point A to point B, with some side objectives you must accomplish before reaching point B.
Examples would be blowing up a gate, collecting grain sacks, or defending a position. Any objectives you may encounter are fairly simple and involve mostly pressing 'E' to interact with stuff and bringing them some place.
While you strive to complete your objectives, various things will happen along the way. From what I gather, there are invisible points on the map, where the game will do a random dice roll (also invisible) to see what to throw at you. If it hits Rat Ogre, you'll hear a Rat Ogre roar and it'll be on you soon. If it hits Horde, then the horn will blow, meaning a horde of Clanrats and Skavenslaves will be on you soon. A few of the notable encounters are as follows:
- Rat Ogre (Hear a roar, fear for your life)
- Special Skaven spawn (Either Packmaster, Gutter Runner, Ratling Gunner or Globadier)
- Horde (A horn will blow signalling that a huge bunch of Clanrats and Skavenslaves are coming)
- Ambush (Something like the Horde, only much more immediate and significantly less rats)
- Final Stand (Large Horde at the end of the level that comes when activating the objective)
These encounters may happen consecutively, so if you get caught with you pants down and a Rat Ogre appears while a Horde is coming and one of your team is being dragged away by a Packmaster, say your prayers and start swinging that mace irrationally (Don't Do That). Encounters depend a lot on luck, but there's a few things you can do to minimize damage on your team.
For Hordes or Ambushes, try grouping your team in a small space with only a few entry points. That way the swarm won't be able to surround each of you easily and a defensive formation can ensure your team takes very little damage. For the Rat Ogre, distribute its attention throughout the team. You can get its attention by performing block bashes. The person who has its attention should run as far as they can while the others just try to deal as much damage as possible. For Special Skaven spawns, you'll usually hear your team's characters or your own talk when it happens, with a quirky sentence that can inform you of the type which spawned. I recommend immediate disposal of such rats as they become increasingly annoying the longer they are alive.
Lastly, when a game is started, it also randomizes whether or not to spawn a patrol of Stormvermin. These guys, in most situations, are more dangerous than the Rat Ogre. YEAH. I SAID IT. (I don't know what the original writer is taking about here, as long you have someone with an axe or hammer, and your team doesn't act too stupid, you're pretty fine. Unless you're on Cataclysm, because Stormvermin can one hit kill you with their overhead swing.) A bunch of armored buffoons that have your name on their polearm come at you and you won't even be given time to charge up that Armor Penetrating attack. Good news is, they won't look for you if you don't let them know where you are. If you hear them patrolling, get your team and hide. Once they pass by, you'll be able to move forward without fighting them. If you do fight them though, the only times I've ever won against a Stormvermin Patrol is with bombs. The Improved Bombs thrown in the middle of all of them will clean 'em all out at once in Normal mode, but generally, just use bombs until you're confident your team can dispose of the remaining ones.
Tomes and Grimoires[ | ]
During your game, you'll likely find books around. Now, knowledge is power, but not in this case. Before you tell your teachers on me, let me explain. Tomes and Grimoires are items that take up the Healing and Potion slots respectively in your inventory. When successfully carried to the end of the mission, they reward the entire team with special dice that replace your normal dice with higher odds of scoring for your loot roll. Not all levels have Tomes and Grimoires, but the ones that do always have 3 Tomes and 2 Grimoires that are always in fixed locations.
Now, the reason Tomes are dangerous, is because they take up your healing item slot. That's already a danger as you'll essentially be incapable of carrying along healing items. You'll be able to drop Tomes and pick up healing items to use immediately and pick the tome back, but you won't be able to use any healing items in a fight. Sometimes if you don't have a full party, the Ai can pick up tomes and carry them for you, so you can still hold on to your healing supplies. However, they will sometimes discard the Tome for other healing supplies, which is especially aggravating when they do so when you've already dropped down off a ledge and can't go back to retrieve it.
Grimoires are extra dangerous for extra rewards. They reward you with even better dice and more experience points at the end of the mission. In exchange, your entire team's health reduced by 33%. Yeah, scared now? Your entire teams maximum health will be 66% of what it was, while their current health also drops to 66% of what it was. There are 2 Grimoires per each level that has them, so if your team has both Grimiores, that's a total decrease of 66%. Grimoires can not be retrieved after leaving your inventory too, so if someone is holding one and dies, there goes your dice and experience points. Sucks, right? I know. However, unlike Tomes, you are unable pick up potions while you're holding a Grimoire. You would have to literally throw away the Grimore from your inventory by selecting the potion slot and pressing the attack button. And as stated before, Grimoires can not be retrieved after leaving your inventory. So, if you discard a Grimoire, your team will be really mad at you. No, I'm not speaking from experience as far as you know. I absolutely didn't discard a Grimoire by accident (twice) while we were doing a run to collect all the Tomes and Grimoires.
Ranald's Bones: Risk It For The Biscuit[ | ]
This is where going through all the trouble to get the Tomes and Grimoires pays off. The loot phase after successfully completing a game is called Ranald's Bones. How this works is that you'll have 7 Dice and a random line of 7 items, with the good stuff at the top and the worst weapons at the bottom. By bringing tomes and grimoires to the end of the level and reaching Ranald's Bones with them, you'll replace one of your regular die with a different, better dice. Each die will always either result in a Hit or Miss. Better die have a higher chance of getting a Hit and that's what you want, cause for every Hit you get, you go up in the line of items. So if all 7 dice gets Hits, you'll get the item right at the top of the line.
- Bone Dice are the default dice you roll, you start out with 7 of these, and they get replaced with the better ones you get in the game. They have a 2/6 chance of getting a Hit.
- Cursed Dice can be found throughout the game level, and its appearance is completely randomized. These have a 3/6 chance of getting a Hit. So check those chests, because you never know when that shiny big block called "Loot Dice" will appear. They can also be dropped by Loot Skaven. These aren't mentioned in this guide, but they are rats who don't try to hit you. Oh, and they carry a large sack over their shoulders. It'll be obvious who these are.
- Tomes give you a Chaos Die, a nifty little golden die that sorta looks like clockwork. This baby has a 4/6 chance in getting a Hit.
- Grimoires give you a Skaven Die, really obviously green one. It's a 6/6 chance in getting a Hit. Yep, you heard me. Seems like it's worth it now, eh? Don't worry about not seeing it light up during the roll, cause it won't. It's already a 100% chance of a Hit anyway.
That's all there is to Ranald's Bones. Now, rub your dice on some severed rabbit limbs, pray the the RNGeezus, and go for the little orange beauty at the top of that item list!
*Note: While the position of the rarity of the reward slots never changes, the actual rewards in the slots seem to be randomized each game. For example, if you rolled 3 hits last game and got a Green Sword, then If you rolled 3 hits this game, the reward would still be Green, but it might be a Bow this time.
Tips and Tricks[ | ]
Alright, to end off, here's a list of tips and tricks you need to keep in mind when facing the Vermintide:
- You're not rubber; you're glue. Stick together and NEVER EVER be caught alone.
- It's better to avoid the Patrols, unless you're decked out with bombs and have Armor Penetration.
- Always be moving! If you find yourself stuck, it's usually because there are rats on the other side of you, which most likely means you're surrounded. In that case, use a block bash to clear a way out immediately.
- Kill Special Skaven as soon as possible. All of them have the ability to limit your team's response in combat. You do not want to face a horde while any one of these guys are alive.
- When facing Hordes, try grouping up in a small space with less entry points. It will limit their ability to surround you and you can just go to town on them as they line up for you.
- Plan your weapons out carefully. Each character can carry a melee and a ranged weapon. If both your melee and ranged weapons have a low Targets stat, that means you're effectively less useful in a mob fight.
- Only pick up Grimoires if you're confident in your team. You can drop tomes to use healing items and pick them back up, but that cannot be done with Grimoires!
- Waste not. If you encounter healing items on the way but your team doesn't need any, it doesn't hurt to just pop it to get back to full health and pick the one you found up.
- There's a Difference between Healing Droughts and Medical Supplies. You can't drop items unless you pick up something that overtakes its slot so pick them wisely. Healing Droughts are self use, while Medical Supplies can be used on team members. You can however, give a Healing Drought can be given to a player with an empty healing slot.
- Use your strengths. If you're using a sword and shield, don't go swinging that thing around all the time. Keeping up your guard and bashing to keep the horde's attention on you is the best way to ensure the mission passes. Only attack in between guard recharges.
Alright, you should be pretty much ready for the first few rounds of Vermintide. Good luck!
- 01/08/17: Various edits throughout, Mainly focused on fixing misinformation and adding more info on Tomes & Grimoires as well as adding Shrine of Solace info in the Crafting Section
- 03/13/17: Fixed some grammar and spelling mistakes. Removed "only pick up tomes if you're confident in your team"... you can just drop the tomes to pick up healing items; it's not a big deal. Removed some comments to change the author's tone to a lighter tone and remove snarkiness from writer to writer.