Mission Type: |
Main Mission |
Section: |
Ubersreik Act 1 |
Chests: |
23 |
Tomes: |
3 |
Grimoires: |
2 |

| |
The Supply and Demand is a mission in Vermintide.
Synopsis
Supply and Demand is a mission in the 1st act of the base game. The heroes must reach the marketplace and retrieve the last remaining stores of food to keep the Ubersreik resistance alive.
Areas
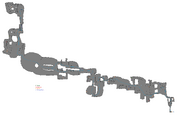
Flugenheimweg
Although there may not be much of anything here, waiting too long may lead to horde spawns. proceed up the stone steps to the left and there may be a consumable or two near the boxes against the wall. If you ignore the stone steps and hug the right side, you will come across a back alleyway with a chest and a statue that may have a consumable placed as an offering. Continue forward to the large street.
Von Holzenauerstrausse
The rat ogre may begin spawning and engage you from this point on. You may either enter the Apothecary to the left or go around it by proceeding further down the street and then turning left and up the ladder.
Von Holzenauer Potion House
Some supplies are usually available in the chests or lying about the house and the building itself is mildly acceptable for taking on a skaven horde. However, there is a chance of the rat ogre spawning in the next area and attacking alongside a horde so an indoor battle may be inadvisable. Once stocked and clear of enemies, proceed up the stairs/ladder and out the door.
The Dog Pens
This area offers several points of approach to the next, but offers numerous blind spots for clan rats to hide in. The first grimoire of the mission is also hidden to the far left beyond a wooden fence (see below for instructions on how to obtain it)
Whichever path of approach you choose, you should end up at the same place so long as you keep going up.
Thulmannplatz
The open plaza will generally have several skaven loitering about. At the right corner of the plaza may have a consumable or two and the left side should lead to a back alley with more supplies.
Also the first tome lies at the end of the stone steps and walkway on the right side (see below)
The Old Granary
You will need to ascend the clockwise spiral staircase of the old granary to reach the other side. Before doing so though, there is a chest to the right of the entrance and there may be other supplies inside the building to the left of the entrance.
While climbing the steps be wary of skaven dropping in from above or special skaven giving chase as unexpected combat in the granary can result in someone dropping from the staircase and taking fall damage. In events like a rat ogre engagement, it may be advisable to return to the ground floor, leave the granary, and prepare for combat in the open space before the granary entrance.
After leaving the granary through the upper floor exit, proceed down the staircase to the left and towards the chest. The second tome can be seen and collected from a box beyond the railing but if unable to reach it, it can be accessed later.
Drop down and proceed through either the large path to the right or the narrow path to the left.
Point of No Return: Once you drop from the platform and proceed to the Merchant Quarter, you will not be able to retrieve consumables and loot from the previous areas. If you have not obtained the first skaven grimoire and tome, they will no longer be accessible.
Merchant Quarter
If you weren't able to pick up the second tome from earlier, a ladder between the exits of both routes into the merchant quarter should lead you to it. Otherwise/afterwards, make your way to the end of the street and up the steps. At the top of the steps, there should be a chest to the left. Continue down the road and the way forward will be straight ahead. Alternatively there's a detour to the left into a building that should turn up a few supplies and land you back on the road eventually.
At the end of the street is a massive fire. Impassable as it is, you will have to make a detour. Turn left and continue into the building. Inside, you are forced to go one of two directions:
If the left doorway is open, proceed to Jaegerstrasse. If the right doorway is open, proceed to Ludwigsplatz.
Jaegerstrasse
Along the left side, there is a back alley where some supplies may be lying about. Otherwise proceed forward to the Schwartz Estate Gardens.
Point of No Return: Once you drop down to the Schwartz Estate Gardens, you will not be able to retrieve consumables and loot from the previous areas. If you have not obtained the second tome, it will no longer be accessible.
There is a chance of special skaven spawning from Ludwigsplatz and proceeding to engage the party. To reach Jaegerstrasse, they will need to drop into their exit into the gardens, cross over to the Jaegerstrasse exit, and climb.
Ludwigsplatz
Directly to the right, there is a corpse in the garden that may have a consumable. Otherwise proceed past the courtyard and into the building. When stocked and good to go, drop into the Schwartz Estate Gardens.
Point of No Return: Once you drop down to the Schwartz Estate Gardens, you will not be able to retrieve consumables and loot from the previous areas. If you have not obtained the second tome, it will no longer be accessible
There is a chance of special skaven spawning from Jaegerstrasse and proceeding to engage the party. To reach Ludwigsplatz, they will need to drop into their exit into the gardens, cross over to the Ludwigsplatz exit, and climb.
Schwartz Estate Gardens
Skaven will often loiter in the gardens, making them difficult to spot in the vegetation. Either take each one out carefully or proceed without alerting as many as possible. Leave the gardens and proceed down the steps.
Carpenter's Guild
The second grimoire sits on top of some high scaffolding that overlooks the entire area (see below for access instructions). Otherwise there may be a few supplies lying inside and around the nearby building. To proceed, either head down the street and over the barricade or to the left past the lumber piles and down to the next area.
Point of No Return: Once you enter the Merchant Quarter Cesspool, you will not be able to retrieve consumables and loot from the previous areas. If you have not obtained the second grimoire, it will no longer be accessible.
Merchant Quarter Cesspool
The third tome lies hidden out of sight in the corner to the right. In the cesspool itself, there are three chests which may contain supplies. Once done, climb the steps to the top of the building. Inside the building should be an ammunition cache and healing items scattered about the tables, as well as a broken wall offering a high up view of the market square and any skaven that may be waiting at the door below to ambush you. Once stocked and loaded, drop through the holes in the floor and attack the gate lock to gain access to the main event.
Point of No Return: Once you have dropped through the floor, you will not be able to return to the upper floor of the building. The third tome, as well as leftover healing supplies and ammunition will no longer be accessible.
The Market Square
Directly in front is Olesya's Carriage and to the left is the marktplatz (marketplace) with five sacks of food scattered about the zone. You will need to retrieve all 5 sacks, carry them slowly across the market square, and deposit them into the carriage, all the while fighting off a constant wave of skaven hordes and specials. Once all five sacks and all player-controlled heroes are safely within the carriage with the door closed, the mission ends.
Warning: Unlike gunpowder barrels, sacks of food will not react when players holding them are attacked by skaven. Nonetheless, as skaven will relentlessly attack you until incapacitated, if unguarded it may be advisable to drop the sack and engage in combat rather than attempting to shrug off the hits and make for the carriage.
Tomes and Grimoires
Tomes
The first Tome is right after an area called "The Dog Pens", Take the alley to the right and at the end there will be stairs going down to your left. At that area there is a house with a small wooden structure at its corner, go to that structure while staying on the upper part of the alley and you will see the Tome.
The second Tome is located close to the burning granary building. once you are at the top of the granary and leave it proceed down the wooden platform and look to your left. Jump onto of the wooden crate and you will be facing the Tome.
The third Tome is in the courtyard just before the final event. Once you enter, go to your left. The Tome is in the corner with some wooden planks.
Grimoires
The first Grimoire is near the beginning, there is a building with a ladder leading to the roof. Climb this and hop onto the tree and onto the next roof, then onto the scaffolding. Walk along this to your left and hop over the fence.
The second Grimoire is after the garden as you near the final event. Climb onto the stagecoach and up onto the roof of the building. Cross to the scaffolding and you will find the Grimoire here.
Map

| Ubersreik | Act 1 | The Horn of Magnus • Smugglers Run • Supply and Demand • Black Powder • The Wizards Tower |
|---|---|---|
| Act 2 | Engines of War • Man the Ramparts • Garden of Morr • Wheat and Chaff | |
| Act 3 | Waterfront • Well Watch • The Enemy Below • The White Rat | |
| Last Stand | The Fall • Town Meeting | |
| DLC Missions | Drachenfels | Castle Drachenfels • The Dungeons • Summoner's Peak |
| Karak Azgaraz | Khazid Kro • The Cursed Rune • Chain of Fire | |
| Stromdorf | The Courier • Reaching Out | |
| Death on the Reik | Reikwald Forrest • River Reik | |
| Arrogance Lost | Trial of the Foolhardy | |
